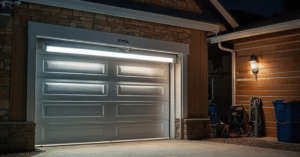
How to replace old style garage door springs is essential knowledge for homeowners who want to keep their garage doors working smoothly and safely. Garage door springs silently carry the weight of your door every single day. When they fail, the door becomes heavy and dangerous to lift. Many older homes still have old style garage door springs installed, and knowing how to replace them safely can save both time and money. This guide will walk you through the process so you understand what needs to be done while staying safe.
What Are Old Style Garage Door Springs?
Before you learn how to replace old style garage door springs, it’s important to understand what makes them different. Older garage systems often use extension springs, located along the sides of the door. When the door opens, the springs stretch and build tension. Newer homes sometimes use torsion springs, which sit above the door and provide smoother operation.
Extension springs work well but are more prone to snapping without warning. When they wear out, the door may slam shut or refuse to open properly. Replacing them promptly is crucial for safety.
Safety First: Why Caution Matters
Old style garage door springs store a high amount of tension. Attempting repairs without proper tools or knowledge can lead to severe injuries. Many homeowners choose to hire professionals, which is always a smart choice.
However, if you have basic mechanical skills and follow precautions carefully, you can manage the replacement safely.
Important safety tips:
- Disconnect the garage door opener.
- Keep the door fully open and clamped in place.
- Wear gloves and protective eyewear.
- Never work with damaged cables without securing the door first.
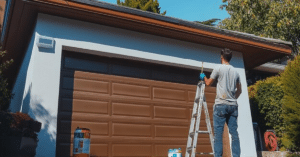
How to Replace Old Style Garage Door Springs Step by Step
Replacing old style garage door springs takes patience and attention. Below are clear steps to guide you.
Step 1: Identify Your Spring Type
Older doors may have open-loop, double-loop, or clipped-end springs. Matching the exact size and type ensures smooth and balanced door movement.
Step 2: Open and Secure the Garage Door
Lift the door manually until fully open. Use C-clamps or locking pliers on the tracks to keep it from falling while you work.
Step 3: Remove the Old Springs
Disconnect the safety cable thread through the spring. Then unhook the spring from the track support and pulley. If frayed or rusted, handle carefully.
Step 4: Install the New Springs
Attach the new spring to the track bracket. Thread the safety cable back through the spring to prevent dangerous recoil if the spring snaps later.
Step 5: Reconnect Pulleys and Cables
Ensure cables run smoothly with no twists. Secure all nuts and bolts tightly to avoid future looseness.
Step 6: Test the Balance
Carefully remove the clamps and lower the door halfway. If it stays in place without falling or rising, the replacement is correct. If not, adjust the tension.
Common Issues When Replacing Old Style Springs
When homeowners look up how to replace old style garage door springs, it’s usually due to one of these problems:
- The door feels extremely heavy
- Springs are visibly stretched or broken
- The opener struggles to lift the door
- The door slams shut quickly
- Rust or corrosion around brackets and pulleys
Recognizing these signs early helps prevent sudden accidents.
When to Call a Professional
Even with clear instructions, spring replacement isn’t always DIY-friendly. Call a garage technician if you notice:
- Broken or tangled cables
- Severe track damage
- Inability to stabilize the door
- Multiple springs failing at the same time
A pro can complete the job quickly and ensure your door operates smoothly.
How Long Do Old Style Garage Door Springs Last?
Typically, extension springs last 7,000 to 10,000 cycles. One cycle equals opening and closing the door once. Daily use shortens the lifespan significantly. Regular inspections help catch issues early and keep the door safe.
Final Thoughts
Knowing how to replace old style garage door springs empowers homeowners to make smarter garage door decisions. While the task is possible to do yourself, safety must always come first. If the job feels overwhelming or risky, relying on a professional is the best choice.
A well-maintained spring system ensures your garage door opens smoothly and protects your family for years to come.
FAQs
Q: How do I know if my garage door springs need replacing?
A: If the door becomes heavy or uneven, or the springs show gaps or rust, replacement is needed.
Q: Should both springs be replaced together?
A: Yes. Replacing only one can cause imbalance and uneven support.
Q: How long does spring replacement take?
A: Professionals typically finish in under an hour. DIY may take longer depending on experience.
Q: Are old style springs safe?
A: They can be safe if maintained, but torsion springs provide a longer-lasting and smoother upgrade.