Your garage door is one of the most noticeable parts of your home’s exterior. Over time, its panels can become dented, cracked, or worn out due to weather, accidents, or simple wear and tear. Learning how to replace garage door panels yourself can save you time and money while improving your home’s curb appeal. In this guide, we’ll cover everything from identifying damage to installing new panels properly, ensuring your garage door works and looks as good as new.
When to Replace Garage Door Panels?
Before diving into the replacement process, it’s important to know when it’s necessary. Not every dent or scratch requires replacing a full panel. However, severe damage can affect the door’s performance, safety, and insulation.
Common reasons for replacing garage door panels include:
- Dents or cracks from car bumps or heavy objects.
- Rust and corrosion due to moisture exposure.
- Warped or misaligned panels that affect door movement.
- Peeling paint or rot in wooden panels.
- Structural damage after years of use.
If only one or two panels are damaged, you can replace just those instead of the entire door — saving significant cost.
Tools and Materials You’ll Need
Before starting the process of how to replace garage door panels, gather the right tools to ensure safety and accuracy.
Essential Tools:
- Screwdriver set
- Adjustable wrench
- Drill with bits
- Pry bar
- Safety gloves and glasses
- Stepladder
- Level
Materials:
- Replacement garage door panels (exact model and size)
- Screws and bolts
- Lubricant for hinges and rollers
Having everything ready before you begin helps make the process smooth and efficient.
Step 1: Disconnect the Power and Secure the Door
Safety should always come first. Start by disconnecting the garage door opener from the power source. This prevents any accidental movement during replacement. Next, manually close the door and secure it in place using clamps on the tracks just below the bottom roller. This keeps it from sliding down while you work.
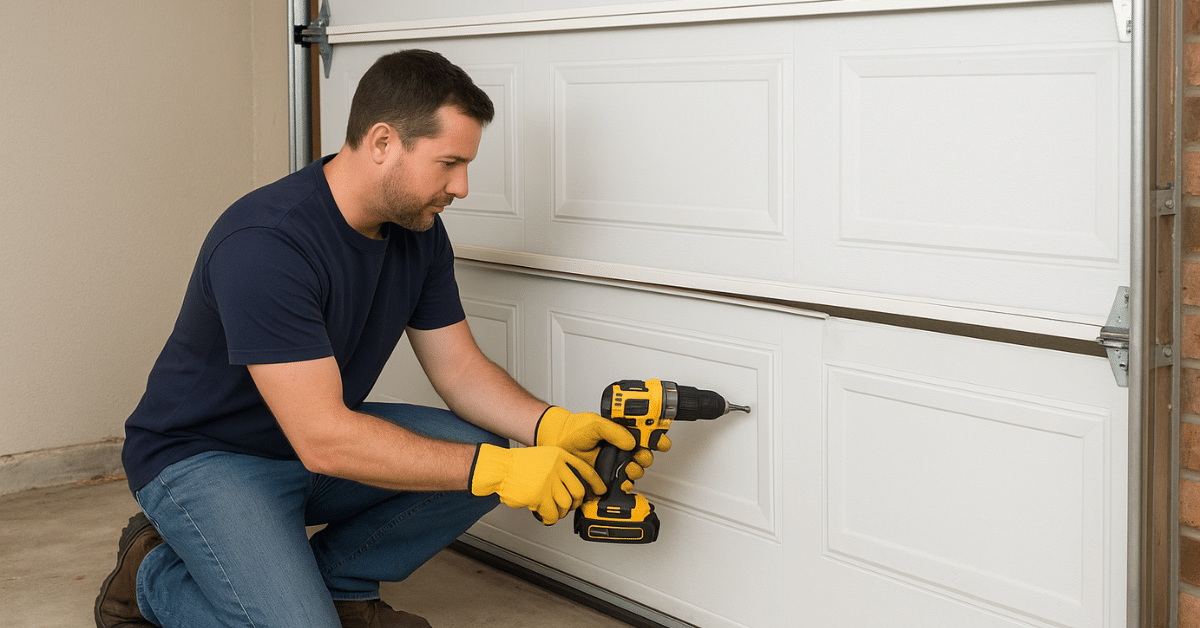
Step 2: Remove the Damaged Panel
To replace a garage door panel, identify the damaged section. Depending on your door’s design, you may need to remove other panels above it to access the one that’s broken.
- Detach the hinges connecting the damaged panel to the one above it.
- Unscrew the panel from its brackets using a drill or screwdriver.
- Slide the panel out carefully, making sure not to bend or scratch surrounding sections.
If you have a multi-panel sectional door, this step will require a bit of patience and precision.
Step 3: Prepare the New Panel for Installation
Before installing the new panel, inspect it for any manufacturing defects. Check the dimensions, color, and style to ensure it matches your existing door perfectly.
Lay the new panel on a clean, flat surface and attach the necessary hinges and hardware before positioning it on the door. A small amount of lubricant on moving parts can help with smooth operation.
Step 4: Install the Replacement Panel
Now that your new panel is ready, it’s time to install it. Slide the replacement panel into the track grooves, aligning it with the existing panels.
- Secure the panel in place using screws and bolts.
- Reattach the hinges connecting it to the panel above.
- Check alignment using a level to ensure it’s straight and even.
If multiple panels are being replaced, repeat the process for each section from bottom to top. Proper alignment ensures smooth door operation and prevents future issues.
Step 5: Reconnect the Garage Door Opener
Once all panels are securely installed and aligned, reconnect the garage door opener. Remove the clamps from the tracks and test the door manually before using the motor.
Lift and lower the door slowly to check for smooth motion. Listen for unusual noises and watch for jerky movements. If the door operates smoothly, reconnect the opener and test it with the remote control.
Step 6: Paint and Finish (Optional)
If your replacement panel came unpainted or doesn’t match the rest of the door perfectly, consider painting or staining it for a uniform look.
Use a high-quality, weather-resistant exterior paint that matches your existing color. Proper finishing not only improves appearance but also adds a layer of protection against the elements.
Maintenance Tips After Replacing Garage Door Panels
Now that you know how to replace garage door panels, regular maintenance can help extend their lifespan and keep your door looking great.
Here are some helpful tips:
- Inspect your door quarterly for dents, rust, or loose hardware.
- Lubricate moving parts (hinges, springs, rollers) every few months.
- Tighten bolts and screws to maintain structural integrity.
- Repaint wooden panels every few years to prevent rot.
- Clean the door surface regularly to remove dust and grime.
Preventive care ensures your panels remain durable and your garage door continues to operate safely.
Common Mistakes to Avoid When Replacing Panels
Even small errors can lead to big problems. To make sure your garage door replacement goes smoothly, avoid these common mistakes:
- Skipping safety steps: Never work on the door while it’s connected to the power source.
- Using the wrong panel size: Always measure carefully before buying replacements.
- Ignoring alignment: Misaligned panels cause strain on the opener and tracks.
- Not checking hardware: Old or damaged hinges can reduce performance and safety.
Following the proper steps and being cautious during installation will help ensure long-term results.
When to Call a Professional
While many homeowners can handle replacing a single panel, some situations require professional help. If your garage door frame is bent, springs are broken, or multiple panels are severely damaged, hiring an expert is the safest choice.
Professional technicians have the right tools, experience, and training to handle complex repairs without risking injury or further damage.
Cost of Replacing Garage Door Panels
The cost of replacing garage door panels depends on several factors such as material, size, and labor charges. On average:
- Single panel replacement: $150–$400
- Multiple panels or full door replacement: $600–$1,200
DIY replacement saves on labor costs, but only if done safely and correctly.
Benefits of Replacing Damaged Panels
Replacing damaged panels not only enhances the appearance of your home but also improves:
- Energy efficiency: Well-fitted panels reduce heat loss.
- Security: Sturdy panels keep your garage safer.
- Functionality: Properly aligned panels ensure smooth operation.
- Property value: A well-maintained garage door boosts curb appeal.
By investing a bit of time in learning how to replace garage door panels, you can restore your garage’s functionality and aesthetics.
Final Thoughts
Replacing your garage door panels might seem like a challenging task, but with the right tools, patience, and a step-by-step approach, it’s absolutely achievable. Whether you’re fixing minor damage or upgrading your door’s appearance, understanding how to replace garage door panels empowers you to take control of home maintenance confidently.
Keep safety at the forefront, follow the procedures carefully, and don’t hesitate to call a professional if the job seems too complex. A well-maintained garage door not only looks better but also lasts longer and works more efficiently — a win for both your home and your wallet.