Yes—many homeowners can handle a DIY install, and it’s one of those projects that feels intimidating until you break it into simple steps. Still, a garage door opener isn’t just a “plug it in and go” device. It’s a motorized system mounted overhead, connected to a heavy moving door, and tied into safety sensors. So the real answer is: you can install it yourself if your door is in good condition, you’re comfortable with tools, and you follow safety rules closely.
In this guide, you’ll learn what’s involved, how to decide if DIY is right for you, what tools you’ll need, and how to install a unit safely and cleanly. By the end, you’ll know exactly whether you should install a LiftMaster garage door opener yourself or bring in a pro for part (or all) of the job.
Who Should Install a LiftMaster Garage Door Opener Themselves?
Before you open the box, think about your comfort level and your garage setup. A DIY installation is most realistic when:
- Your garage has a standard ceiling height and good framing support.
- Your existing door runs smoothly by hand and feels balanced.
- You can lift and hold tools overhead, use a drill confidently, and follow step-by-step instructions.
- You have a helper available for a few moments (highly recommended).
On the other hand, you should strongly consider professional help if:
- The garage door is heavy, sticks, jerks, or feels hard to lift manually.
- The torsion spring system looks damaged, noisy, or unstable.
- Your ceiling is very high, angled, or finished in a way that makes mounting difficult.
- You need new wiring, outlets, or complicated smart-home integration.
DIY is doable, but it’s not a good idea to “power through” if your door has mechanical problems. The opener is not designed to fix a bad door—it will struggle, wear out faster, and could become unsafe.
Safety First: What You Should Know Before You Start
This part matters more than speed or convenience. A garage door system stores serious energy in its springs, and the door itself can weigh a lot.
Here are the safety rules that keep DIY installers out of trouble:
- Do not adjust torsion springs unless you’re trained. Spring work is the #1 reason DIY installs go wrong.
- Unplug power while assembling and mounting. You’ll be handling wiring and moving parts.
- Use safety glasses and a sturdy ladder. You’ll be drilling overhead and tightening hardware above your head.
- Never remove or bypass the photo-eye sensors. They’re a key safety feature that prevents accidents.
- Test the safety reversal system after installation. This is essential, not optional.
If any of these points feel uncomfortable, that’s not a failure—it’s a good signal to call a professional for the high-risk parts.
Tools and Supplies You’ll Need
Most DIY installs go smoothly when you have everything ready before you begin. Here’s a practical list:
- Ladder (tall enough for your ceiling)
- Tape measure
- Pencil/marker
- Drill/driver with bits
- Socket set or nut drivers
- Adjustable wrench
- Level
- Stud finder (or a reliable method to locate framing)
- Stepladder for sensor installation
- Safety glasses and work gloves
You may also need:
- Angle iron or mounting brackets (depending on your ceiling framing)
- Lag screws (if not included or if your framing requires longer ones)
- Extension cord temporarily (only until you install properly)
- A helper to lift and steady the opener motor unit during mounting
Good prep prevents frustration later. It also helps you keep the installation neat and aligned.
Choosing the Right LiftMaster Opener for DIY
LiftMaster models vary, but the install approach is similar. The biggest differences are the drive system and features:
- Belt drive: quieter, great for attached garages
- Chain drive: durable, usually louder, often more budget-friendly
- Wall-mount (jackshaft): mounts beside the door on the torsion bar (more advanced install)
If you want the easiest DIY path, a standard ceiling-mounted belt or chain model is usually the simplest. Wall-mount units can be DIY-friendly too, but only when the door hardware and torsion setup are ideal.
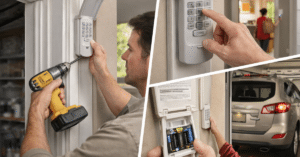
Step-by-Step Overview to Install a LiftMaster Garage Door Opener Yourself
This section gives you a clear, beginner-friendly sequence. Always follow the specific manual for your model, but use this outline to understand the workflow and avoid common mistakes.
1) Check the Door Balance and Condition
Before you mount anything, disconnect any existing opener and lift the door manually.
- It should move smoothly.
- It should stay about halfway open without slamming down or drifting up.
If it fails this test, fix the door first. Otherwise, your opener will be under constant strain.
2) Assemble the Rail and Trolley
Most LiftMaster ceiling units ship with a rail system that connects the motor to the door.
- Lay parts on the floor.
- Assemble the rail sections.
- Install the trolley and chain/belt according to the guide.
- Set correct tension (not too tight, not sagging).
Take your time here. Clean assembly makes the rest easier.
3) Mount the Header Bracket Above the Door
This bracket anchors the rail above the door and takes a lot of force.
- Find the centerline of the door.
- Mark the header location above the top section.
- Attach the bracket into solid framing (not just drywall).
If your framing isn’t ideal, use proper reinforcement. A strong header mount prevents shaking and noise later.
4) Position the Opener and Attach the Rail to the Header Bracket
Now you’ll connect the rail to the header bracket.
- Lift the rail end to the bracket.
- Insert the pin/fastener as directed.
- Keep everything centered and aligned.
At this point, the motor unit is usually still resting on the ladder or supported on a box—don’t fully hang it yet.
How to Install a LiftMaster Garage Door Opener Yourself Properly
If you’re serious about doing it right, the difference is in your alignment and mounting. This is where many DIY installs become noisy or unreliable.
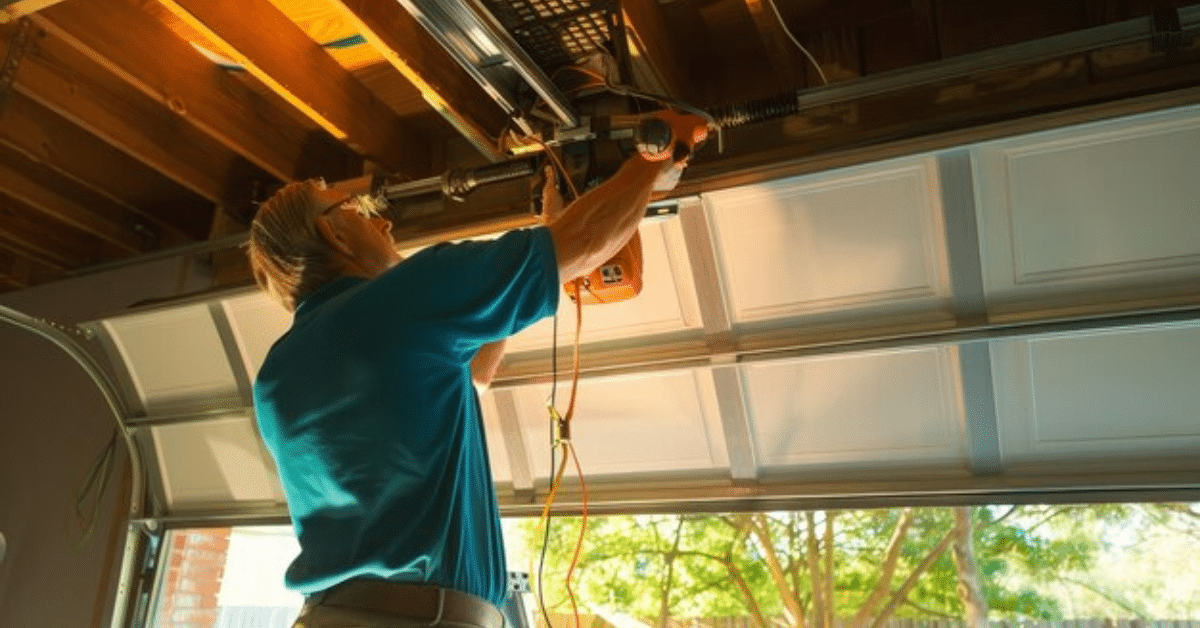
Hang the Motor Unit Securely
This is typically the hardest part physically.
- Locate ceiling joists or strong framing.
- Use angle iron or mounting straps for a stable hang.
- Keep the opener level (front-to-back and side-to-side).
- Maintain the correct distance above the door.
A crooked opener causes vibration, uneven travel, and premature wear. So even if it takes longer, get the hang perfect.
Install the Door Arm and Connect to the Trolley
Next, you’ll connect the moving trolley to your garage door.
- Install the door bracket on the top section (reinforced area)
- Attach the straight and curved arms
- Adjust so the door moves cleanly without binding
Avoid mounting the door bracket too low. The geometry matters, and the manual’s measurements are there for a reason.
Wiring and Sensors When You Install a LiftMaster Garage Door Opener Yourself
This is the part many people rush. Don’t. Sensors and wiring are what keep the system safe and dependable.
Install the Safety Sensors
LiftMaster photo eyes must be installed near the floor on both sides.
- Mount them typically 4–6 inches above the ground (or per manual)
- Aim them directly at each other
- Secure the brackets so they don’t shift
If your sensors blink or fail to stay aligned, you’ll get random reversals or refusal to close—so lock them in firmly.
Run and Secure the Wires Neatly
Use staples designed for low-voltage wire or wire clips.
- Run wires along the wall and ceiling edges
- Keep wires away from moving parts
- Avoid pinching or over-stapling
Neat wiring doesn’t just look good—it prevents future failures.
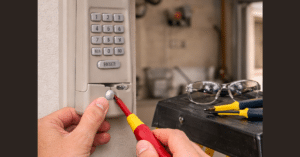
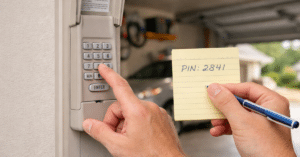
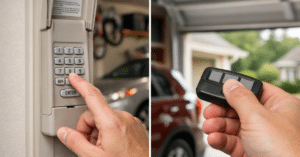
Install the Wall Control and Optional Keypad
Place the wall button where you can see the door fully.
- Mount at a safe height away from children
- Follow the wiring path carefully
- If you add a keypad, follow pairing steps
This is also a good time to set up any smart features, if your model supports them.
Programming, Force Settings, and Testing
Once everything is mounted and wired:
- Plug in the unit
- Program travel limits (how far open and closed)
- Set force correctly (not excessive)
- Test the safety reversal
- Test sensor reversal by blocking the beam
This is where you confirm your installation is not only functional but safe. The door should reverse on contact with an object and should refuse to close when sensors are blocked.
Common DIY Mistakes to Avoid
Even careful homeowners make a few predictable errors:
- Mounting the header bracket into weak wood or drywall
- Hanging the opener from thin sheet metal instead of solid framing
- Misaligned sensors that “work sometimes”
- Over-tightening the belt/chain
- Skipping safety tests
- Using the opener to “force” a sticky door instead of fixing the door
Avoid these, and your opener will run quieter, last longer, and feel professional.
When It’s Better to Call a Professional
DIY isn’t always the smart route. Consider pro help if:
- The door is not balanced or has damaged springs
- You need electrical work (new outlet, rewiring)
- Your garage has unusual construction or limited mounting options
- You’re installing a wall-mount opener and aren’t sure about compatibility
- You want warranty peace of mind through professional installation
Sometimes the best approach is hybrid: you can assemble the opener and prep the area, then hire a pro for the final mounting and calibration.
Final Verdict: Should You Do It?
For many homeowners, yes—you can install a LiftMaster garage door opener yourself with the right tools, careful alignment, and strict attention to safety steps. It’s a satisfying project, and once it’s done, you’ll understand your garage system much better.
However, if your door has mechanical issues or you’re unsure about overhead mounting and calibration, it’s smarter (and often cheaper long-term) to bring in a professional rather than risk damage or injury.
FAQs
Q: Can one person install a LiftMaster garage door opener?
A: You can, but it’s much easier and safer with a helper—especially when lifting and hanging the motor unit.
Q: How long does it take to install a LiftMaster opener?
A: Most DIY installs take 4 to 8 hours, depending on experience, wiring neatness, and whether you’re replacing an older unit.
Q: Do I need an electrician to install it?
A: If you already have a ceiling outlet nearby, usually no. If you need new electrical work, hire a licensed electrician.
Q: What’s the hardest part of installation?
A: For most people, it’s hanging the motor unit level and secure and getting the sensors perfectly aligned.
Q: Will installing it myself void the warranty?
A: It depends on the product terms and who performs the installation. Keep receipts, follow the manual closely, and register the product to protect coverage.