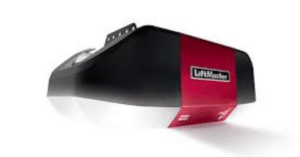
If you’re planning to add a new garage door opener, one of the first questions you’ll ask is simple: how long does it take to install a LiftMaster opener? The good news is that most installations are not all-day projects. In many cases, a professional can finish in a couple of hours, and a careful DIY homeowner can complete the job in an afternoon.
However, install time varies a lot depending on your garage setup, your door condition, your opener type, and whether you’re replacing an old unit or starting from scratch. So instead of giving you one unrealistic number, this guide explains realistic time ranges, what slows things down, and how to plan your installation so you don’t get stuck halfway through.
Typical Installation Time: Realistic Ranges
Here are the time ranges most people experience:
- Professional installation (replacement): about 1.5 to 3 hours
- Professional installation (new install): about 2 to 4 hours
- DIY installation (replacement): about 4 to 7 hours
- DIY installation (new install): about 6 to 10 hours
These numbers assume the door is in good condition and you have standard ceiling height. If your door needs service, or your garage has unusual framing or wiring, the job can take longer.
A helpful way to think about it is this: the opener itself doesn’t take the longest—the mounting, alignment, wiring, and testing do.
What Makes LiftMaster Installation Faster or Slower?
Several factors determine how long does it take to install a LiftMaster opener in your specific garage. Let’s break them down.
1) Replacing an old opener vs installing for the first time
Replacing an opener is usually faster because:
- The ceiling already has mounting points or a known location
- A ceiling outlet might already be there
- The door bracket and header area may already be reinforced
A first-time install can take longer because you may need to:
- Install a new header bracket position
- Add reinforcement
- Run new wiring more neatly
- Decide placement from scratch
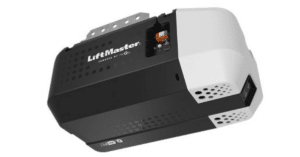
2) Opener type: chain, belt, or wall mount
- Chain drive: usually straightforward, but can require careful tensioning
- Belt drive: similar to chain, sometimes easier to fine-tune, often quieter
- Wall-mount (jackshaft): can be fast in the right setup, but slower if your torsion system or clearance is tricky
Wall-mount units also require a compatible torsion bar setup and sometimes extra accessories, which can add time.
3) Door condition and balance
A balanced door that moves smoothly makes installation faster because:
- The opener travel limits are easier to set
- The motor doesn’t fight friction
- Sensor alignment is more stable since the door runs evenly
If your door is heavy, sticks, or slams, installation slows down. In some cases, you must fix the door first—otherwise you risk burning out the opener or creating unsafe operation.
4) Your tools and experience
DIY time usually doubles when:
- You stop repeatedly to find tools
- You’re not sure about stud/joist locations
- You need to redo mounting because the opener isn’t level
- You haven’t installed sensors or programmed limits before
If you’re organized and follow the manual carefully, DIY time drops significantly.
Is LiftMaster better than other garage door opener brands?
Step-by-Step Timeline: Where the Hours Go
A practical way to estimate the total time is to understand the steps. Below is a typical breakdown for a standard ceiling-mounted LiftMaster opener.
Step 1: Prep and door check (20–45 minutes)
This includes:
- Clearing workspace
- Checking door balance
- Measuring ceiling height and door centerline
- Confirming you have the right parts
If you skip prep, you’ll lose more time later.
Step 2: Assembling the rail system (45–90 minutes)
Most LiftMaster openers require rail assembly with a chain or belt installation. This step takes longer if it’s your first time.
Tip: lay parts on cardboard and keep hardware grouped so you don’t mix bolts.
Step 3: Mounting the header bracket (20–45 minutes)
This step can be fast if your framing is accessible. It can take longer if you need reinforcement because the header area doesn’t provide solid wood where you need it.
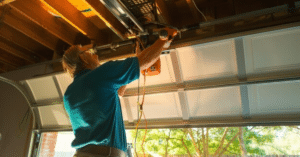
Step 4: Hanging the motor unit (45–120 minutes)
This is the step that often defines the entire job.
It takes time because:
- You must locate joists
- You need stable mounting using angle iron or brackets
- You must level the opener precisely
- You often need a helper to hold the unit
If the opener is not level, you may spend extra time correcting vibration and noisy operation later.
Step 5: Installing door arm and bracket (20–45 minutes)
This is usually straightforward, but correct placement matters. If you mount too low, the geometry can make opening rough and loud.
Step 6: Sensors and wiring (45–90 minutes)
Sensor alignment is easy when done patiently and difficult when rushed. Running wire neatly also adds time, but it pays off.
Step 7: Programming travel limits and force (20–40 minutes)
This step is quick once everything is mounted correctly. If your door binds or sensors are misaligned, you’ll repeat this step multiple times.
Step 8: Testing and final adjustments (20–45 minutes)
This includes:
- Safety reverse test
- Sensor reversal test
- Fine-tuning belt/chain tension (if needed)
- Lubrication check on door hardware (optional but helpful)
How Long Does It Take to Install a LiftMaster Opener DIY vs Pro?
This is where most people make their decision.
Professional installation: why it’s faster
Pros do this every day. They:
- Know exactly where to mount for best performance
- Have the right brackets, tools, and bits on hand
- Avoid common mistakes (crooked rails, weak mounting, sensor misalignment)
- Finish programming quickly
For a replacement job, how long does it take to install a LiftMaster opener with a pro is often just a couple of hours.
DIY installation: why it takes longer
DIY usually takes longer because you’re:
- Learning the steps
- Interpreting diagrams
- Measuring twice (which is good!)
- Handling heavy parts alone
- Adjusting as you go
The upside is cost savings and the satisfaction of doing it yourself—if you’re comfortable with the work.
How Long Does It Take to Install a LiftMaster Opener If You Replace an Old One?
If you’re swapping an existing opener, you can often save time, but only if the old setup was done well.
A smooth replacement can be:
- Pro: 1.5–3 hours
- DIY: 3–6 hours
However, replacement can take longer if:
- The old opener used odd mounting brackets
- The ceiling framing needs reinforcement
- The new opener requires a different rail length
- You’re upgrading to a different style (like wall-mount)
In other words, replacing an opener is usually faster, but it’s not always “plug and play.”
Time Add-Ons: What Can Extend the Job?
If you’re planning your day, consider these common add-ons that increase install time:
No ceiling outlet nearby
If you need new electrical work, that can add hours and may require a licensed electrician. Even if you use an extension cord temporarily, you’ll still want a proper outlet for a clean, code-friendly setup.
High ceilings or angled ceilings
Extra height adds time because:
- You need stronger mounting support
- You may need longer hanging brackets
- Working overhead becomes slower and more tiring
Door needs service
If the door is not balanced or the rollers and hinges are worn, you might lose time troubleshooting when the opener refuses to close properly.
Smart features and setup
Many LiftMaster models support Wi-Fi/app control. Setup isn’t hard, but it adds time if:
- Wi-Fi signal is weak in the garage
- Firmware updates are needed
- You’re pairing keypads and remotes
Tips to Install Faster Without Cutting Corners
If your goal is to finish on time, speed comes from preparation, not rushing.
Get everything ready before you start
- Unbox and verify parts
- Charge your drill battery
- Lay out hardware by step
- Read the manual once fully
Mark your centerline and measurements early
A clear centerline saves time during:
- Header bracket placement
- Rail alignment
- Door arm setup
Ask someone to help for 30 minutes
A helper can cut your time significantly during:
- Motor hanging
- Rail alignment
- Ladder stabilization
Don’t rush sensor alignment
If you rush, you’ll waste more time later resetting and troubleshooting. Align sensors carefully once, then tighten securely.
Planning Your Installation Day
If you’re doing DIY, plan like this:
- Start early (daylight helps)
- Reserve 6–8 hours even if you think you’ll be faster
- Avoid doing it right before a trip or work shift
- Have a backup plan in case you need a bracket or extra hardware
Most DIY installs become stressful when you’re racing the clock.
Common Signs the Install Is Taking Too Long (and Why)
If you’re stuck for more than 30–45 minutes on the same step, it’s usually one of these issues:
- You’re mounting into weak material (drywall, thin wood)
- The opener isn’t level
- The rail is not centered over the door
- Sensors are slightly misaligned
- The door is not balanced
Fix the root cause and the rest becomes easier.
Conclusion
So, how long does it take to install a LiftMaster opener? In most normal garages:
- A pro usually finishes in about 2–4 hours
- A careful DIY homeowner often needs about 6–8 hours
If you’re replacing an opener and your setup is standard, you can land on the lower end. If your garage is unusual or your door needs work, plan for more time.
The best approach is to focus on a clean, level install with proper testing. When you do that, you get a quieter opener, fewer problems, and safer daily use.
FAQs
Q: How long does it take to install a LiftMaster opener by yourself?
A: Most DIY installs take 4–10 hours, depending on whether it’s a replacement and how comfortable you are with tools.
Q: Can a professional install a LiftMaster opener the same day?
A: Often yes, and many pros complete a standard install in 2–4 hours once on-site, depending on your setup.
Q: What step takes the longest?
A: For most people, hanging and leveling the motor unit takes the longest because it requires accurate mounting into ceiling framing.
Q: Does a belt drive take longer to install than a chain drive?
A: Usually not. Both are similar. The biggest time difference comes from mounting, wiring, and programming—not the drive type.
Q: How can I reduce installation time?
A: Prep your tools and workspace, read the manual once, mark the centerline early, and get a helper for lifting and leveling.